|

|
First, I made lines at the front and back of the case the width
of the ruler away from the edge. This will provide clearance for
the 5/16" fender washers that will reinforce the inside of the top of the
case.
Next, make a mark at the center of the case on each line...
|
...place the ruler next to the line, and center the U-Bolt.
This is a 1-1/2" U-Bolt, meaning it is 2" wide, so marks were made 1" away
from the center line, as well as 11/16" away from the center line.
This will give us two 5/16" holes spaced equally from the center.
|

|

|
|
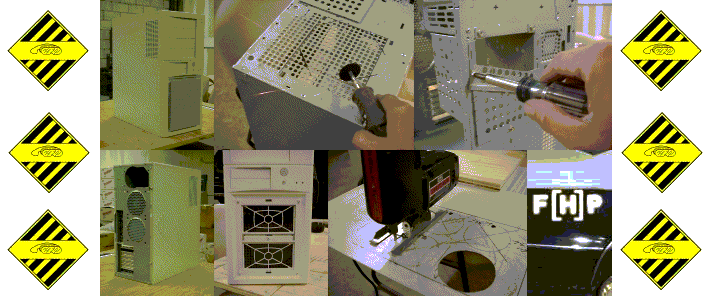
Carefully drill the holes out to 5/16" and deburr.
|
Run the nuts all the way up the threads, slip the supplied plate
over the U-Bolts (regular 5/16" flat washers may be used as well), and
slip the U-Bolts into the holes. The fender washers shown in photo
#3 are slipped over the inside, and a second 5/16" (coarse thread) nut
is run against it to secure. I used 5/16" "Jam" nuts. These
are NOT nylon or self-locking nuts, but they are about half the thickness
of a standard 5/16" coarse nut. This allows the ends of the U-Bolt
to be trimmed a bit closer with a Dremel, allowing for a bit more clearance
in cases that don't have a lot of room between the top of the case and
PSU or top drive bay.
|

|

|
|
Here is the underside showing the large 5/16" fender washers used
to spread the load of the case over a wider area. Yes, Dynamat has
been installed and the case has been painted in these four photos.
|
A view of the top of the finished cover.
|

|

|
|
Safety glasses check! Dremel the U-bolts off as nearly flush
with the nuts as you can get them. This provides clearance for the
power supply and a drive in the top drive bay.
|
Here you can see that, using the thin jam nuts and cutting off
the U-bolt, there is no protrusion into the top drive bay.
In case you were wondering, yes, my "workbench" is a 4x4 sheet of plywood
resting on the arms of some junk chairs in the warehouse at my office.
|